SocialMate – Messaging & AI Agent · Events and messages
Your first message
Choose one event, write it, test it.
Every plan
Every message the plugin sends is one you choose and write yourself. This guide sends the most common one — “we have your order” for a WooCommerce shop — from start to a test on your own phone. Every other event works the same way.
Before you start
- Every plan The plugin connected to SocialMate.
- WooCommerce active, for this example. No shop? Bookings, forms, site alerts, sign-in codes and chat buttons work on any WordPress site — see the links at the end.
- Your own WhatsApp number, with the country code, for the test.
Steps
1Open the Events tab
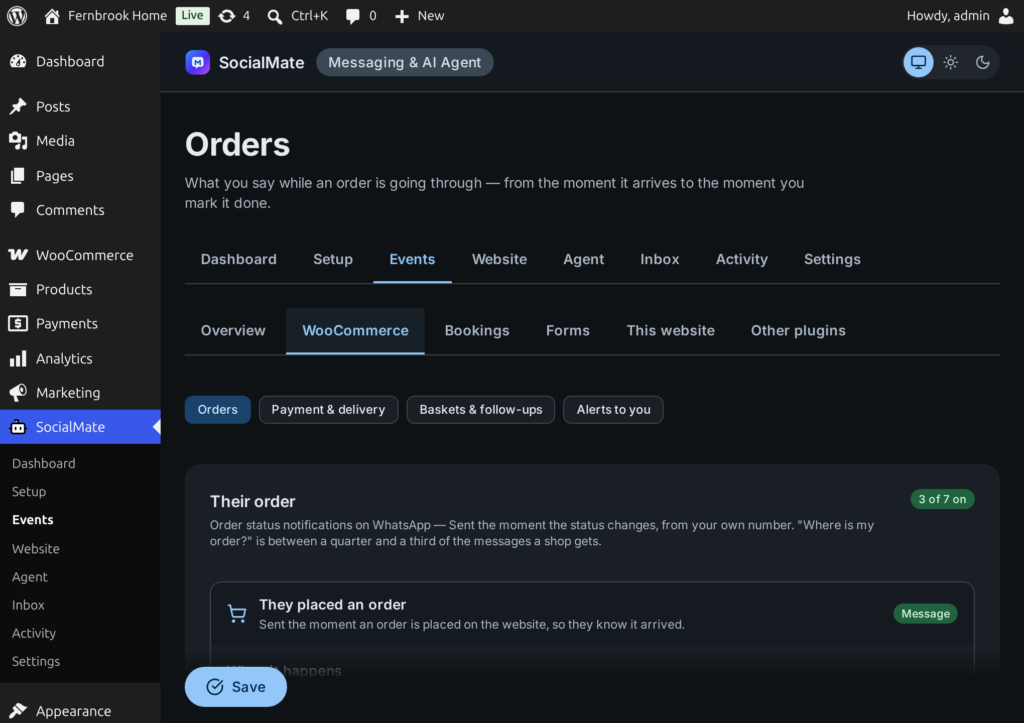
Open SocialMate → Events. It is one list of everything that can happen on your site, grouped on its own tabs: Overview, WooCommerce, Bookings, Forms, This website and Other plugins. WooCommerce has its own row: Orders, Payment & delivery, Baskets & follow-ups and Alerts to you.
With WooCommerce active, its events are there already. Every event is off until you choose — Setup may have picked the recommended ones for you.
2Clear “Before anything sends”
Until everything is ready, the Overview shows a short checklist. Nothing on the Events tab can send until all four are true:
- Connect the SocialMate server that holds your number — done in Setup → Connect.
- Choose which number sends order updates — a shop with one number has this already; with several, choose under Settings → Numbers.
- Choose what happens for at least one event — the next step does this.
- Add your own number — under Settings → Your business & owners → Your numbers. Alerts to you and every test go there.
The checklist disappears once everything is done, and the Overview shows what was sent instead.
3Choose “Send a message” and write it
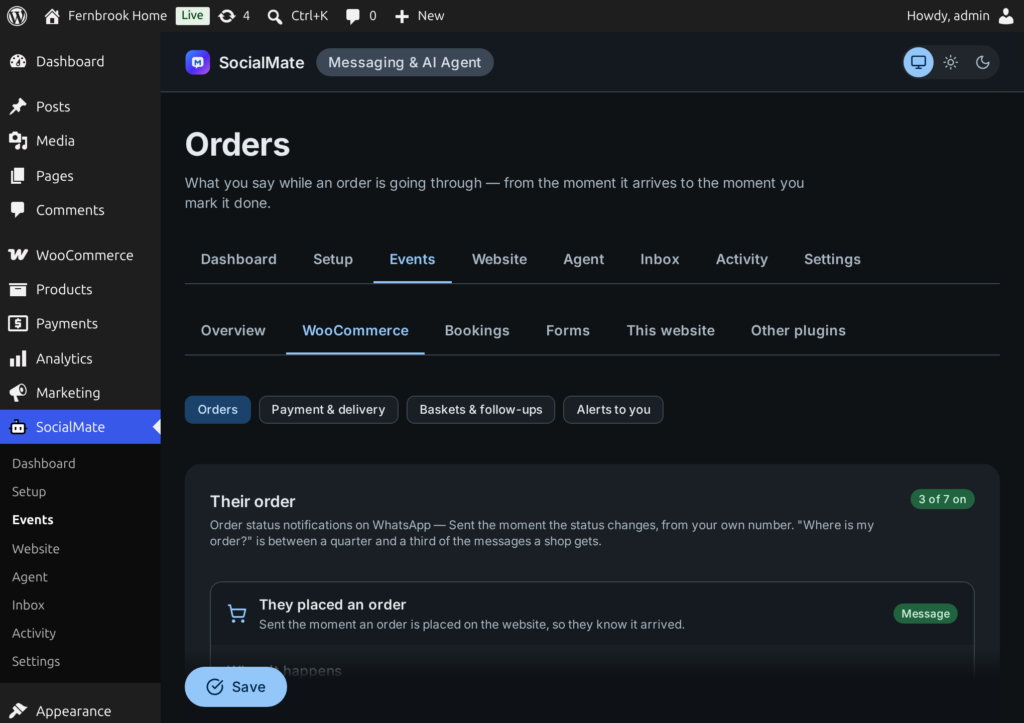
Open WooCommerce → Orders and expand They placed an order.
- When it happens — pick Send a message. (The other choices are Off and Agent task; one choice per event, so a customer is never told twice.)
- What it says — your text. Anything in braces is filled in when it sends, such as
{customer_name},{order_number},{items}and{order_total}. The full list is under Settings → Message options. - Write alternatives in braces with a bar —
{Hi|Hello}— and each customer gets one of them, so the message does not arrive word for word identical every time. Keep the facts (order number, total, links) in every alternative.
Under the box, What arrives shows the message with sample values. An order update always goes to whoever placed the order; replying STOP does not turn it off.
4Send a test to yourself
Press Send this to my number. The preview goes to your own number — never to a customer — and should arrive within seconds. If it asks for your own number first, finish step 2.
5Save, then watch what was sent
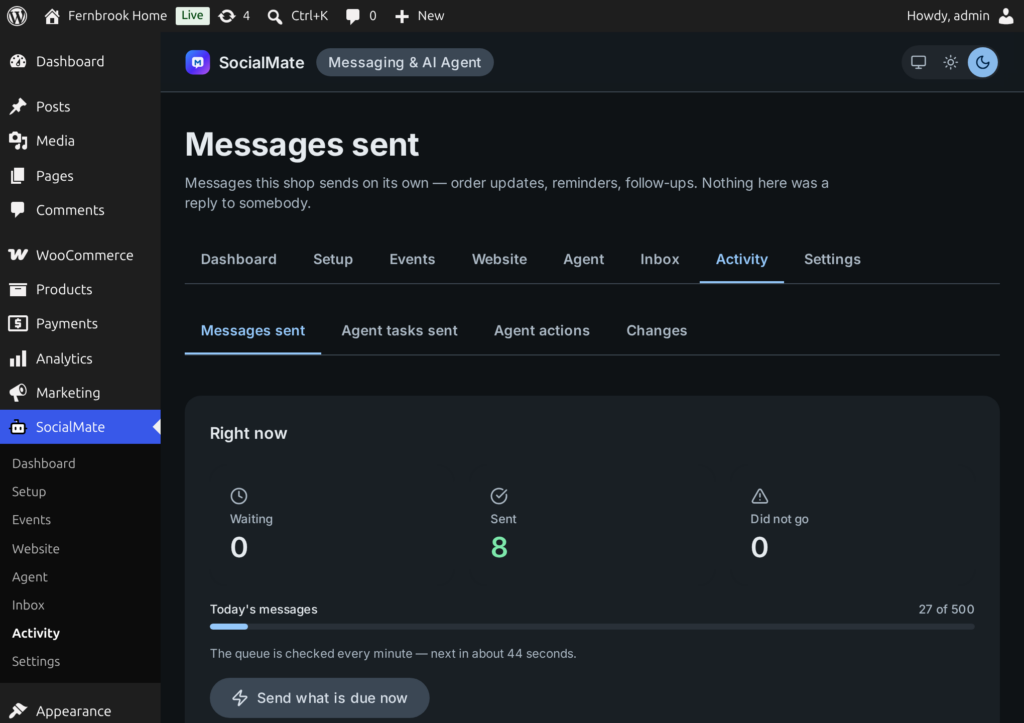
Press Save. From now on, each new order queues the message and it goes out within your number’s limits. Every message the site sends is listed under Activity → Messages sent — see Sending pace and Messages sent.
Good to know
One choice per event. Each event is Off, Send a message or Agent task — never two at once — so the same news never reaches a customer twice. An agent task needs SocialMate Pro; a message works on every plan.
- Clear the box and save to go back to the suggested wording. A tag the shop cannot fill in (for example a tracking number on an order without one) disappears instead of showing braces.
- Offers and reminders go only to the audience you choose for each; order updates go to whoever placed the order.
- A message needs a phone number with a country code. The checkout can add a missing one for you — see Consent, opt-in and STOP.
Next
- The Events tab — bookings, forms, this website and other plugins.
- WooCommerce order updates — every status, tracking and payment reminders.
- Sign in with a WhatsApp code — works without a shop.
- Chat buttons and shortcodes — no server needed.
- How messages work